21 Creative Fall Treats for Kids to Make

Fall is the perfect season to slow down and enjoy baking with the kids. Whether you’re looking for a fun weekend activity, an after-school project, or treats to make for a fall party, this collection has plenty of easy recipes to choose from. From festive cookies and cupcakes to sweet snacks and simple desserts, these fall treats are fun to make and even better to share with family and friends.

WANT TO SAVE THIS FOR LATER?
This roundup is filled with fun fall treats like cute turkey cookies, creamy pumpkin truffles, candy-covered pretzels, and easy no-bake Rice Krispies treats. Many of these recipes are kid-friendly, so little helpers can join in the kitchen and make sweet memories while baking together.
Check out this list of fall themed treats and desserts!
Apple Slice Cookies

Apple Slice Cookies are one of the easiest treats in this collection. Fresh apple slices are topped with sweet spreads, chocolate, sprinkles, and other fun toppings, creating a healthier dessert kids can personalize themselves.
Apple Slice Cookies
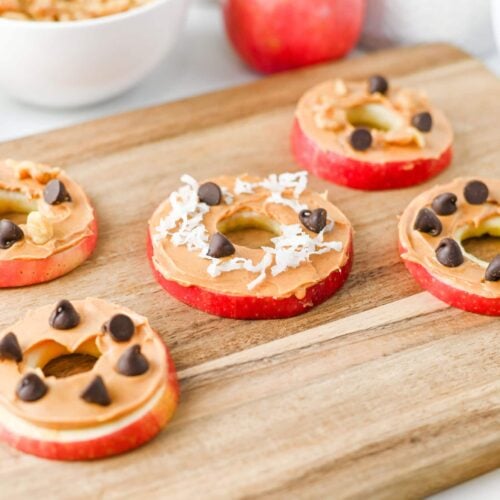
Ingredients
- 4 apples
- Lime juice for soaking
- About 1/3 cup peanut butter
- Chocolate chips sweetened coconut flakes, chopped nuts, or desired toppings
Instructions
- Slice the apples to get 3 to 4 slices from each apple.
- Use the wide end of a piping tip to remove the core from each slice.
- Soak the apple slices in lime juice for a few minutes to help prevent browning.
- Pat the apple slices dry with paper towels.
- Spread a thin layer of peanut butter on each apple slice.
- Sprinkle with chocolate chips, coconut flakes, chopped nuts, or any toppings you like.
- Serve immediately and enjoy.
Want more like this? See the original post on Bite-Sized Bash.
Soft Snickerdoodle Truffles

Soft Snickerdoodle Truffles combine warm cinnamon flavors with a creamy center for a cozy fall dessert. They’re a great addition to cookie trays and make wonderful homemade gifts.
Soft Snickerdoodle Truffles
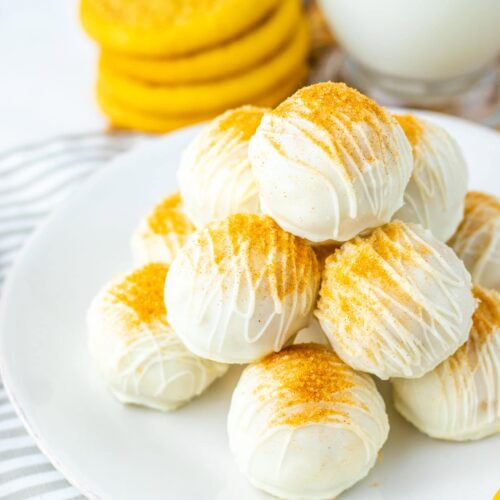
Ingredients
- 14 oz 2 packages of snickerdoodle cookies (about 15 cookies)
- 8 oz 1 package of cream cheese (room temp)
- 24 oz bar of vanilla almond bark
- 3 tbsp sugar
- 1/2 tsp cinnamon
Instructions
- Place the cookies in a food processor and pulse until you have fine crumbs. Add the crumbs to a large bowl with the cream cheese. Mix with a hand mixer on medium speed until fully combined and a dough forms.
- Line a tray with parchment paper. Using a cookie scoop, scoop a bit of dough and roll into a 1 1/2-inch ball. Place on the tray and repeat until all the dough is used.
- Freeze the tray for 2 hours. Meanwhile, melt the almond bark in a medium microwave-safe bowl, stirring every 30 seconds until smooth.
- Take the balls out of the freezer one at a time. Dip each ball into the melted almond bark, flipping carefully with two forks. Tap off extra chocolate and place back on the tray.
- Mix the sugar and cinnamon in a small bowl. Drizzle leftover almond bark over each truffle, then sprinkle the cinnamon sugar on top. Repeat until all truffles are coated.
Want more like this? See the original post on Bite-Sized Bash.
Your kids will surely love this Pumpkin Patch Dirt Cups, easy-to-make treats feature a sweet cream cheese filling and chocolate mousse pudding sandwiched between layers of crushed Oreos.
Chocolate-Dipped Pecan Pie Balls

If you love pecan pie, these chocolate-dipped bites deliver those familiar flavors in a small, easy-to-serve dessert. They’re rich enough for holiday gatherings while still being simple to prepare.
Chocolate-Dipped Pecan Pie Balls
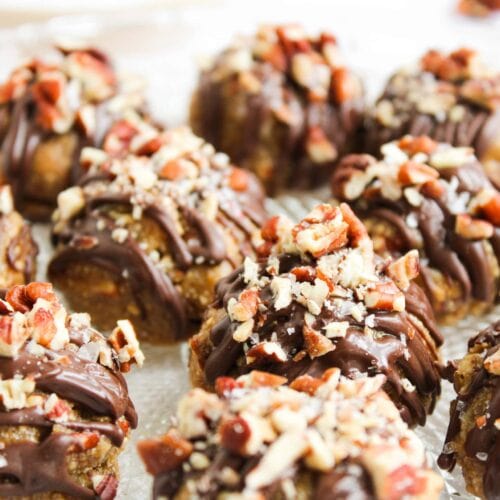
Ingredients
- 2 cups chopped pecans
- 1 cup graham cracker crumbs
- ¾ cup brown sugar
- ¼ tsp salt
- ¾ cup corn syrup
- 1 tsp vanilla extract
- 10 oz milk melting chocolate
- sea salt and extra pecans optional for garnish
Instructions
- In a large bowl, mix together the chopped pecans, graham cracker crumbs, brown sugar, and salt. Add the corn syrup and vanilla, stirring until everything is well blended.
- Roll the mixture into small balls and place them on a parchment-lined baking sheet. Freeze for about 45 minutes to 2 hours, or until firm.
- Melt the chocolate according to the package instructions, then dip or drizzle each ball with the melted chocolate.
- If you like, top them with extra chopped pecans and a sprinkle of sea salt while the chocolate is still soft.
- Let them sit at room temperature until the chocolate sets completely.
Want more like this? See the original post on Bite-Sized Bash.
This harvest puppy chow is so easy to make, add this on your list too!
Nutter Butter Owl Cookies

These owl cookies are another fun no-bake idea that comes together quickly. They’re cute, easy to customize, and perfect for both Halloween and Thanksgiving dessert tables.
Nutter Butter Owl Cookies
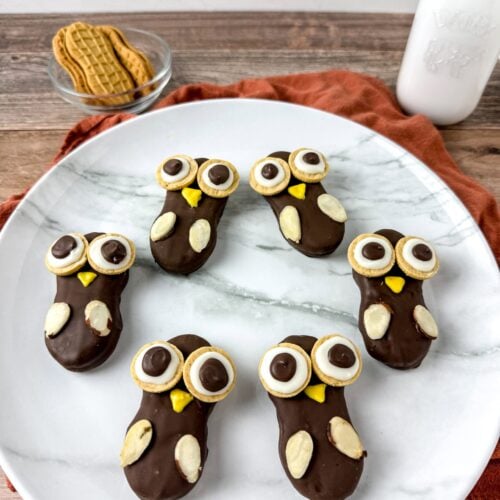
Ingredients
- 10 Nutter Butters
- 6 Ounces Brown Chocolate Melts
- 1 Ounce Yellow Chocolate Melts
- 1 Ounce White Chocolate Melts
- Mini Vanilla Cookie Sandwiches
- Sliced Almonds
Instructions
- Melt the brown chocolate melts in a microwave-safe bowl in 15–30 second increments, stirring between each until smooth.
- Dip one Nutter Butter at a time into the chocolate until fully coated. Lift with a fork and scrape excess chocolate on the edge of the bowl. Place on parchment paper. Repeat for all cookies.
- Place coated cookies in the freezer for 5 minutes to harden. Put the remaining chocolate in a piping bag.
- Separate the mini vanilla cookie sandwiches and discard the cream filling.
- Melt the white chocolate melts the same way. Place in a piping bag and cut a small tip. Pipe a circle on the flat side of each cookie half to make the whites of the eyes. Let dry for 3 minutes.
- Cut a small hole in the piping bag with the brown chocolate. Pipe a small circle on top of each white circle for the pupils. Let dry. (Reheat if needed.)
- Use brown chocolate to attach the eyes to the Nutter Butters.
- Melt the yellow chocolate melts and place in a piping bag. Pipe a small triangle under the eyes for the beak.
- Use chocolate to attach sliced almonds on each side as the owl’s wings. Let sit for 3 minutes to set.
Want more like this? See the original post on Bite-Sized Bash.
Nutter Butter Scarecrow Cookies

Turn simple Nutter Butter cookies into adorable scarecrows with candy melts and colorful decorations. These cheerful cookies fit right in at any fall celebration.
Nutter Butter Scarecrow Cookies
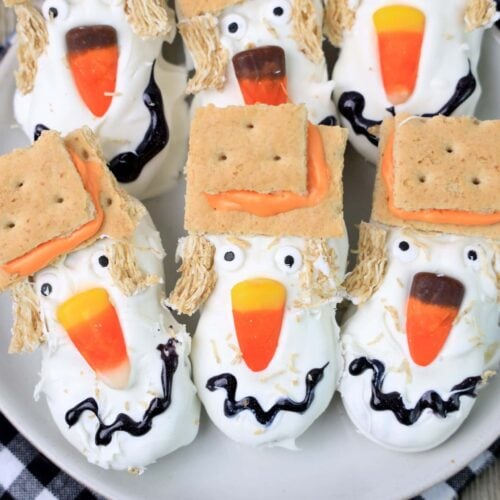
Ingredients
- 10 Nutter Butter cookies
- 20 candy eyeball sprinkles
- 10 candy corns
- 6 half graham crackers
- 6 mini shredded wheat pieces
- 1 tube black sparkle gel Wilton
- 1 bag Ghirardelli white chocolate melting wafers
- ½ cup orange candy melts
Instructions
- Melt the white chocolate wafers following the directions on the bag.
- Dip the Nutter Butter cookies into the melted chocolate and place them on parchment paper.
- Place a larger piece of graham cracker on top of each cookie to form the hat.
- Add candy eyes and a candy corn for the nose. Position a piece of shredded wheat just below the sides of the graham cracker hat.
- Use the black sparkle gel to draw on the scarecrow’s mouth.
- Melt the orange candy melts as directed.
- Brush a little onto the graham cracker.
- Then place the smaller graham cracker piece on top. Let it sit in the fridge for a few minutes to set.
Want more like this? See the original post on Bite-Sized Bash.
Turkey Leg Rice Krispies Treats

These playful Rice Krispies Treats are shaped to look like turkey legs, making them a fun conversation starter for Thanksgiving dinner or school events. Kids especially enjoy helping shape and decorate them.
Turkey Leg Rice Krispie Treats

Ingredients
For The Turkey Bones
- ½ cup white chocolate melting chips, melted
- ½ cup mini marshmallows
- Pretzel rods (break in half to form the turkey leg bones)
For The Turkey Meat & Gravy
- ½ stick unsalted butter, browned
- 10 oz. bag of jumbo marshmallows
- ⅓ cup sweetened condensed milk
- 6 cups Rice Krispies cereal
- ½ cup semi-sweet chocolate chips, melted
Instructions
- Begin by breaking the pretzel rods in half so that each "turkey leg" has a sturdy handle.
- Melt your white chocolate chips in the microwave, stirring every 20 seconds until smooth. Take two mini marshmallows, dip their flat ends in the melted chocolate, and attach them to the broken end of the pretzel rod. Press gently to "glue" them together, creating a fun bone-like shape.
- Once your marshmallow bones have set for about 10-15 minutes (either at room temperature or in the fridge), dip the whole bone—pretzel rod and marshmallows into the remaining white chocolate. Place them back on the parchment paper and let them harden.
- In a large saucepan, melt your butter over medium heat until it begins to brown slightly. Then, stir in the jumbo marshmallows and cook until they melt down into a smooth, creamy consistency. Add the sweetened condensed milk and stir to combine.
- Gradually add the Rice Krispies cereal to the marshmallow mixture, gently folding them in until each piece is coated in the gooey marshmallow goodness. Let it cool for a few minutes until it’s safe to handle but still moldable.
- Grab a small handful of the Rice Krispy mixture and mold it around the end of each pretzel rod, covering it like turkey meat on the bone. Be sure to leave the marshmallow "bone" end visible. Press firmly to make sure the cereal sticks to the pretzel rod and holds its shape. Repeat with the remaining pretzel rods.
- Melt the semi-sweet chocolate chips and drizzle over the Rice Krispy turkey legs to resemble gravy draping over the top. Let the chocolate set for a few minutes before serving.
Want more like this? See the original post on Bite-Sized Bash.
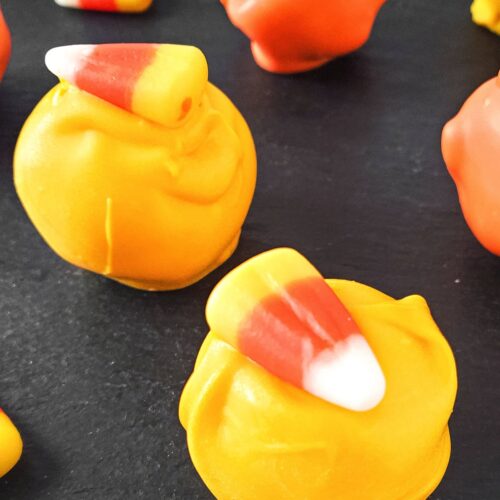
Sweet Candy Corn Oreo Truffles

Candy Corn Oreo Truffles are creamy, colorful, and fun to serve throughout the fall season. Their bright candy corn colors make them stand out on any dessert platter.
Candy Corn Oreo Truffle
Ingredients
- 1 (13.29 oz) package of Golden Oreo Cookies
- 8 oz cream cheese, softened
- 1 ½ cups yellow candy melts
- 1 ½ cups orange candy melts
- 48 pieces of candy corn
Instructions
- First things first—get those Golden Oreos crushed up! You can use a food processor or toss them into a ziplock bag and go to town with a rolling pin or meat mallet.
- In a large bowl, combine the crushed cookies with softened cream cheese. Mix it really well until it’s nice and smooth.
- Roll the cookie mixture into small balls, about 1 inch in size (or a little bigger if you prefer). Place them on a parchment-lined baking sheet.
- Pop that tray into the freezer and let them chill for about an hour.
- Melt your yellow and orange candy melts in separate bowls, following the package instructions. Once melted, remove your Oreo balls from the freezer.
- Dip half of the balls into the yellow candy melt and the other half into the orange. Place them back onto the parchment paper and immediately top each truffle with a candy corn.
- Give them a little time to settle, and then you’re ready to enjoy!
Want more like this? See the original post on Bite-Sized Bash.
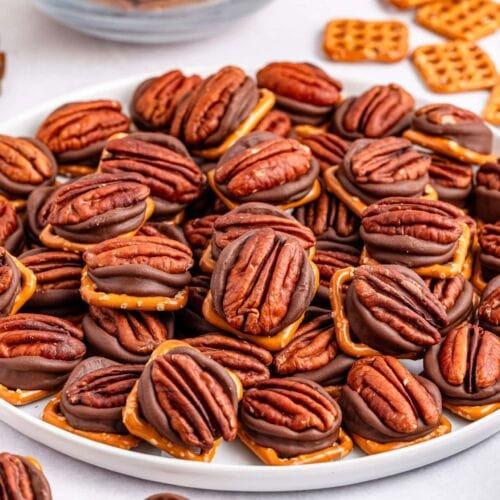
Crunchy Pecan Rolo Pretzels

These bite-sized treats combine pretzels, chocolate caramel candies, and crunchy pecans for a delicious sweet-and-salty snack. They’re always one of the first treats to disappear at fall parties.
Pecan Rolo Pretzels
Ingredients
- 48 pretzel snaps
- 48 Rolos, unwrapped
- 48 pecan halves
Instructions
- Preheat the oven to 275°F and line a baking tray with parchment paper.
- Arrange the pretzels on the tray, spacing them out about an inch apart.
- Top each pretzel with an unwrapped Rolo.
- Bake for 2-4 minutes—just enough to soften the Rolos without fully melting them.
- Remove from the oven and press a pecan half onto each Rolo, gently pushing it down to spread the chocolate.
- Cool completely on the counter, or speed things up by placing them in the fridge for about 10 minutes.
Want more like this? See the original post on Bite-Sized Bash.
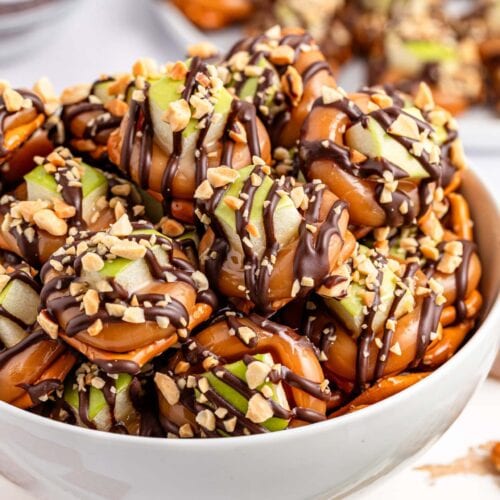
Caramel Apple Pretzel Bites

Caramel Apple Pretzel Bites combine sweet caramel, crunchy pretzels, and apple flavors into one easy snack. They’re perfect when you want something simple without spending hours in the kitchen.
Caramel Apple Pretzel Bites
Ingredients
- 50 pretzel snaps
- 50 Kraft’s caramel squares
- 3 granny smith apples
- ¼ cup finely chopped peanuts
- ⅓ cup semisweet chocolate chips or dark chocolate melting wafers
Instructions
- Set your oven to 275°F and line a baking tray with parchment paper for easy cleanup.
- Lay your pretzel snaps on the tray, making sure they’re spaced out. Place a caramel square on top of each pretzel.
- Slide that tray into the oven for about 10-15 minutes, just until the caramel softens. Be careful not to over-bake! You want the caramel to be gooey and soft, not a total melty mess.
- While the caramel is doing its thing in the oven, core and cube your granny smith apples into 1-inch pieces. To keep them from turning brown, soak the apple cubes in lemon juice or salt water for a few minutes, then pat them dry.
- When the pretzels and caramel come out of the oven, quickly press an apple cube onto each caramel pretzel. This will help the apple stick to the warm caramel.
- Melt your chocolate chips or wafers in a microwave-safe piping bag, using the defrost or low setting to prevent burning. Once melted and smooth, snip the tip of the bag and drizzle the chocolate over the caramel pretzel bites.
- Sprinkle chopped peanuts (or your choice of nuts) over the drizzled chocolate before it sets.
- Allow the bites to cool completely so everything can set, and you’re ready to dig in!
Want more like this? See the original post on Bite-Sized Bash.
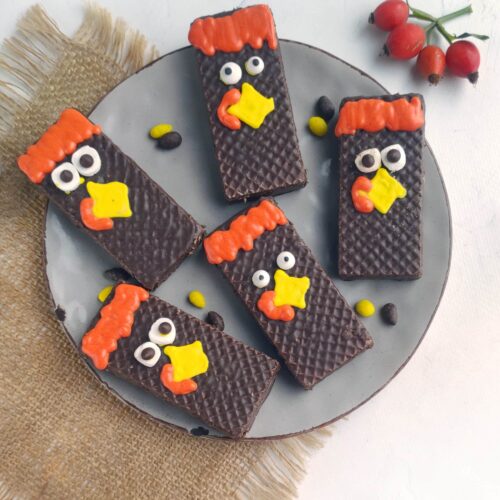
Cute Turkey Chocolate Bars

These decorated chocolate bars couldn’t be easier to put together. Wrapped and decorated to look like turkeys, they make wonderful classroom treats, party favors, or Thanksgiving place settings.
Turkey Chocolate Bars
Ingredients
- 5 candy bars (choose your favorite: wafer bars, nutty chocolate, etc.)
- 1 marshmallow
- Sugar eyes
- 1 tsp chocolate chips
- 1/3 cup white chocolate
- Yellow and red food coloring
Instructions
- Start by cutting your marshmallows into discs using a knife or scissors.
- Unwrap the candy bars and place them on a flat surface like a cutting board.
- Melt the white chocolate in a double boiler. Add yellow food coloring and, using a pastry syringe, draw the turkey’s beak. Add two drops of chocolate where the eyes will go, and "glue" the marshmallow discs or sugar eyes in place. Add a drop of chocolate on each marshmallow to form the pupils.
- Mix red food coloring into the remaining yellow chocolate and use it to draw the turkey’s comb and wattle.
- Place the bars in the fridge for an hour to set. Once they’re ready, they’re good to go!
Want more like this? See the original post on Bite-Sized Bash.
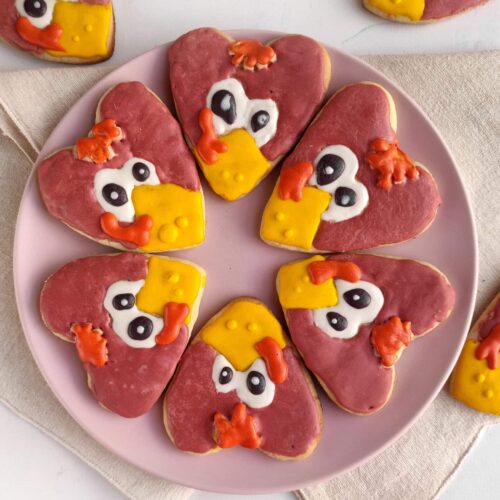
Turkey Sugar Cookies

Turkey Sugar Cookies are a fun baking project for the whole family. Decorate each cookie with colorful frosting and candies to create unique little turkeys everyone will enjoy making.
Turkey Sugar Cookies
Ingredients
- 3/4-pound sugar cookie dough (store-bought or homemade)
- 2/3 cup white chocolate chips
- Food coloring: yellow, red, and brick
- A little dark chocolate for the pupils
Instructions
- Start by cutting your dough into finger-thick discs. Dust your board with flour, roll out the dough to about 1/2 inch thick, and use a heart cookie cutter to shape the discs into turkeys. If the dough sticks, rolling it between two sheets of parchment paper helps.
- Place the heart shapes on a baking paper-lined board, then use the remaining dough to create scallop shapes for the turkey feathers. Chill the cookies in the refrigerator for 30 minutes.
- Preheat your oven to 392°F (200°C). Bake the cookies for 10-12 minutes or until the bottoms are golden brown. The cookies should stay white on top. Let them cool on a wire rack.
- Melt the white chocolate chips in a double boiler. Divide the icing into portions and color some yellow for the beak. Outline and fill in the beak on each cookie. Once the icing sets, add two dots for the nostrils using dark chocolate.
- Use white icing to outline the eyes and fill them in. Refrigerate the cookies for about 10 minutes to let the icing set.
- Color the remaining icing brick red and spread it over the cookies.
- After another 10-minute chill, use more icing to add the red turkey wattle and dark chocolate pupils for the eyes.
Want more like this? See the original post on Bite-Sized Bash.
Dark Chocolate Pumpkin Truffles

These Dark Chocolate Pumpkin Truffles have a rich chocolate coating with a creamy pumpkin filling inside. They’re an easy make-ahead dessert that’s perfect for Thanksgiving or fall entertaining.
Dark Chocolate Pumpkin Truffles

Ingredients
For the Filling:
- 1/2 cup pumpkin puree (pure pumpkin)
- 1/4 cup cream cheese, softened
- 1/2 tsp vanilla extract
- 1 tsp pumpkin pie spice
- 1/4 tsp ground cinnamon
- 1/4 cup powdered sugar
- 1 cup graham cracker crumbs (use gingersnap crumbs)
For the Coating:
- 10 oz dark chocolate, chopped (or dark chocolate chips)
- 1 tbsp coconut oil optional
For Garnish (optional):
- Sea salt flakes
- Crushed graham crackers
- A dusting of cocoa powder
Instructions
- In a mixing bowl, blend together the pumpkin puree, softened cream cheese, vanilla extract, pumpkin pie spice, and cinnamon until smooth.
- Stir in the powdered sugar and graham cracker crumbs until the mixture is well combined and holds together.
- Cover the bowl and refrigerate the filling for at least 2 hours, or until it’s firm enough to roll into balls.
- Once firm, use a spoon or small cookie scoop to roll the filling into 1-inch balls. Place them on a parchment-lined baking sheet and pop them into the freezer for 30 minutes to set.
- While the truffles are freezing, melt the dark chocolate and optional coconut oil in a double boiler or microwave in short 20-second bursts. Stir until smooth.
- Using a fork or toothpick, dip each frozen truffle into the melted chocolate, ensuring it’s fully coated. Let the excess chocolate drip off before placing the truffles back on the parchment.
- Before the chocolate sets, sprinkle a little sea salt, crushed graham crackers, or cocoa powder on top of each truffle for that extra touch.
- Refrigerate the truffles for 15 minutes or until the chocolate is fully hardened.
Want more like this? See the original post on Bite-Sized Bash.
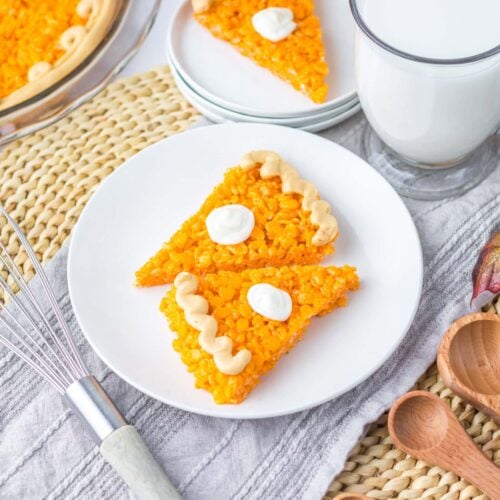
Pumpkin Pie Rice Krispies

If you love pumpkin pie flavors but want something easy, these Pumpkin Pie Rice Krispies are a great choice. They combine the soft, chewy texture of marshmallow treats with warm fall spices.
Pumpkin Pie Rice Krispies
Ingredients
- 1/2 cup unsalted butter
- 10 oz marshmallows
- Orange food coloring
- 6 cups Rice Krispie cereal
- 1 tsp vanilla extract
- 8 oz cream cheese
- 4 cups powdered sugar
- 2 tbsp milk
- 1/2 cup peanut butter
Instructions
- In a large pot, melt the butter over medium-low heat. Once it's melted, add the marshmallows and about 5-10 drops of orange food coloring. Stir until the marshmallows are completely melted and you get a lovely pumpkin color. Turn off the heat.
- Stir in the Rice Krispies quickly until they’re fully coated. Spray two 9-inch pie pans with non-stick cooking spray.
- Divide the mixture evenly between the pans, pressing it down and smoothing it out. Use the bottom of a measuring cup sprayed with cooking spray to help press the mixture evenly. Let them set on the counter for about an hour.
- After an hour, flip the pans upside down onto a baking sheet lined with parchment paper. Gently remove the Rice Krispies from the pans, flip them right side up, and slice into pie-shaped pieces—about 8 slices per pan.
- In a medium bowl, beat the cream cheese with a hand mixer until fluffy. Gradually add the vanilla, powdered sugar (one cup at a time), and milk, beating until you get a thick icing.
- Transfer 1/3 cup of this mixture into a small zip-top bag and set it aside. Mix the peanut butter into the remaining cream cheese mixture, then transfer it to another small zip-top bag.
- Cut a small tip off the corner of the bag with the cream cheese mixture and pipe a dollop onto the center of each Rice Krispies slice. Use the peanut butter mixture bag to pipe a swirl or "crust" on top of each slice.
Want more like this? See the original post on Bite-Sized Bash.
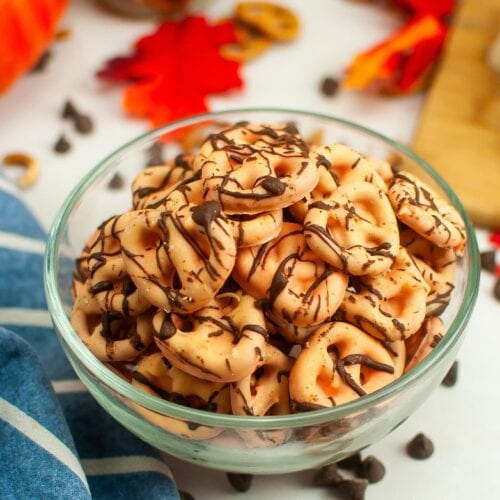
Pumpkin Spice Chocolate Dipped Pretzels

Crunchy pretzels coated in chocolate make a simple fall snack everyone enjoys. They’re perfect for parties, gift bags, or afternoon treats.
Pumpkin Spice Chocolate Dipped Pretzels
Ingredients
- 6 cubes white chocolate almond bark
- 1 tablespoon oil
- Orange food coloring (or a mix of yellow and pink)
- 2 cups pretzels
- 1 cup semisweet chocolate chips
- 2 teaspoons pumpkin pie spice
Instructions
- Start by placing the white chocolate bark in a microwave-safe bowl with 1/2 tablespoon of oil. Microwave for 45 seconds, then give it a good stir. Continue to heat in 30-second intervals, stirring in between, until the chocolate is completely melted.
- Drop in a few splashes of orange food coloring and stir until you get that perfect pumpkin hue. If you’re mixing your colors, go for a ratio of 2 parts yellow to 1 part pink.
- Now for the fun part! Dunk each pretzel into the orange chocolate, making sure it’s fully coated. Lay them out on a parchment-lined tray to dry.
- While the orange chocolate sets, melt the semisweet chocolate chips in the same way you did the white chocolate. Once melted, stir in the pumpkin pie spice. This adds a warm, aromatic kick that’s quintessentially fall.
- Drizzle the spiced chocolate over your dried pretzels. Let everything cool completely.
- Serve and Enjoy!
Want more like this? See the original post on Bite-Sized Bash.
Cute Chocolate Oreo Turkeys

These Oreo Turkey Cookies are almost too cute to eat. Chocolate sandwich cookies, candy melts, and colorful candies create festive little turkeys that look great on any fall dessert table.
Oreo Turkeys
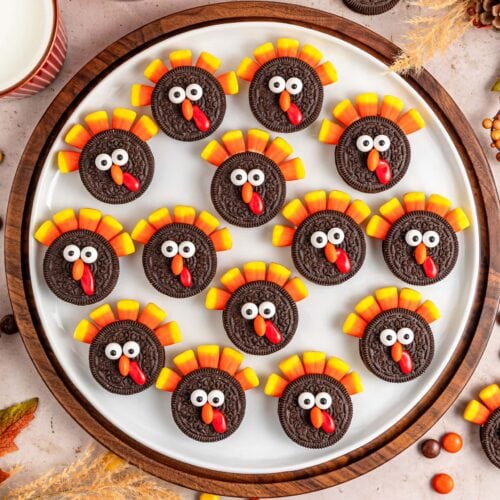
Ingredients
- 24 Oreo cookies (any flavor, Regular or Double Stuff)
- 120 pieces of candy corn
- ½ cup dark chocolate melting wafers
- 48 candy eyeballs
- Orange Reese’s Pieces, cut in half
- Red cookie icing
Instructions
- In a microwave-safe bowl, melt the dark chocolate wafers on a low or defrost setting in 30-second increments. Stir after each interval until the chocolate is smooth and set it aside to cool slightly.
- Line a baking tray or board with parchment paper for easy transport. Carefully separate the Oreos, placing the halves on the parchment paper.
- Add a small amount of melted chocolate towards the top of half the cookies. Work in small batches of 4-6 cookies to prevent the chocolate from setting too quickly.
- Arrange 5 candy corn pieces on top of each cookie for the turkey’s feathers, gently pressing them into the chocolate.
- Place the remaining Oreo halves on top of the candy corn feathers. Use a skewer to dab a small amount of melted chocolate on the front of the cookie where the eyes will go. Press the candy eyeballs into place.
- Dip the skewer in chocolate again and add a small dab below the eyes. Place a halved Reese’s Pieces on top for the turkey’s beak.
- Using the red cookie icing, pipe a small line next to the beak to create the turkey’s wattle or snood.
- Transfer the Oreo Turkeys to the refrigerator to set for 5-10 minutes. Once set, they’re ready to enjoy!
Want more like this? See the original post on Bite-Sized Bash.
Nutter Butter Turkey Cookies

Nutter Butter Turkey Cookies are easy to assemble and require very little baking. Peanut butter cookies become adorable turkeys with candy decorations, making this an excellent activity for younger kids.
Nutter Butter Turkeys
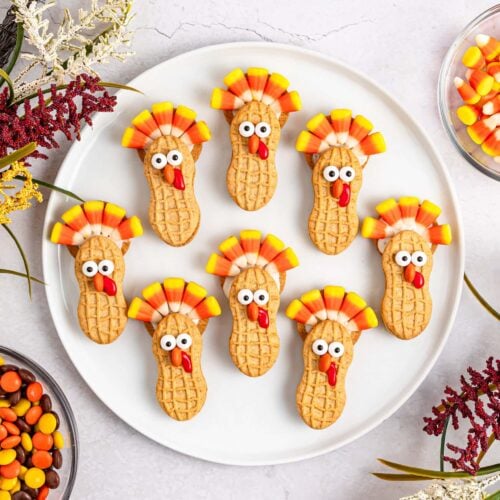
Ingredients
- 24 regular peanut-shaped Nutter Butter cookies
- 12 large round Nutter Butter cookies
- ½ cup white candy melts (more if needed)
- 120 candy corn pieces
- 48 candy eyeballs
- Orange Reese’s Pieces (cut in half)
- Red cookie icing
Instructions
- Start by melting your white candy wafers. Use the low or defrost setting on your microwave, heating in 30-second bursts and stirring in between until the candy is smooth and melted. Let it cool slightly before you start working with it.
- Line a baking tray with parchment paper. Separate your round Nutter Butter cookies—feel free to keep or discard the peanut butter filling, depending on your preference.
- Spread a bit of the melted candy on the round cookie, then place a peanut-shaped Nutter Butter on the lower half. You’ll want to work quickly here before the candy sets.
- Grab five candy corn pieces and place them on top of the peanut-shaped cookie, close together like turkey feathers. The round cookie in the back will help support the candy corn, making sure everything stays upright.
- Dip the end of a skewer (or a chopstick) into the melted candy, then dab a little onto the top part of the Nutter Butter. Pop on two candy eyeballs and gently press them down to secure.
- Dab a bit more candy melt just under the eyes and press on a halved Reese’s Piece for the beak. Give it a gentle press to ensure it sticks.
- Use the red cookie icing to pipe a little wattle (that dangly thing turkeys have!) on one side of the beak.
- Allow your turkeys to set completely before serving. You can leave them at room temperature for 15-20 minutes or pop them in the fridge for 5-10 minutes if you’re in a hurry.
Want more like this? See the original post on Bite-Sized Bash.
Candy Corn Rice Krispies

These Candy Corn Rice Krispies are a fun twist on the classic marshmallow treat. Colored to look like candy corn, they’re a cheerful dessert for Halloween and Thanksgiving celebrations alike.
Candy Corn Rice Krispies
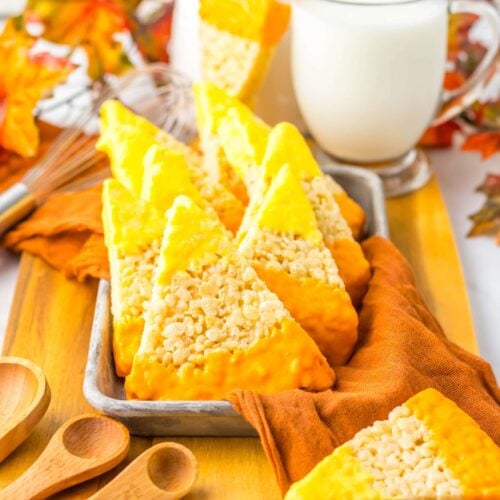
Ingredients
- 1/2 cup of butter
- 10 oz mini marshmallows
- 6 cups of Rice Krispies cereal
- 1 tsp vanilla extract
- 2 cups of yellow candy melts
- 2 cups of orange candy melts
Instructions
- Start by melting the butter in a large pot over low heat. Add the marshmallows and stir constantly until they're completely melted. Mix in the vanilla extract. Then, fold in the Rice Krispies cereal until everything is well combined.
- Spray two 9-inch pie pans with non-stick cooking spray. Divide the Rice Krispie mixture between the pans and press it down evenly with oiled hands or the bottom of a measuring cup. Place the pans in the fridge for 30 minutes to 1 hour to set.
- While the Rice Krispies are chilling, melt the yellow and orange candy melts in separate microwave-safe bowls. Heat them in 30-second intervals, stirring in between, until smooth. If the melts are too thick, you can add a teaspoon of vegetable oil.
- Carefully remove the Rice Krispie circles from the pie pans and place them on parchment paper. Slice each circle into six wedges.
- Dip the pointed end of each wedge into the yellow candy melts and scrape off any excess. Then, dip the top part into the orange candy melts. Repeat with all the wedges.
- Allow the candy-coated Rice Krispies to harden on the parchment paper for about 10 minutes before serving and enjoying!
Want more like this? See the original post on Bite-Sized Bash.
Thanksgiving Rolo Pretzel Turkey Treats

Sweet and salty always make a great pair, and these Rolo Pretzel Turkey Treats are no exception. Pretzels, caramel candy, chocolate, and candy eyes turn into cute little turkeys that kids love helping decorate.
Rolo Pretzel Turkeys
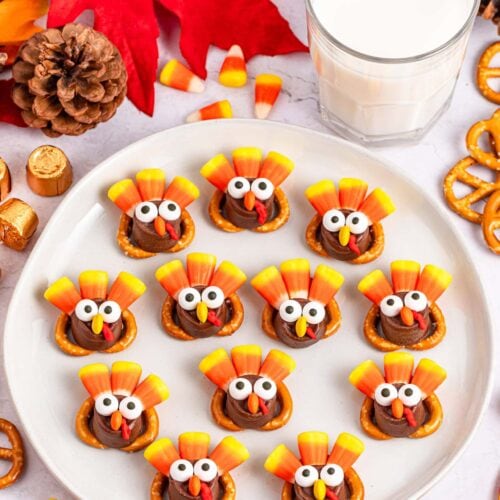
Ingredients
- 24 mini pretzel twists
- 24 Rolos, unwrapped
- 72 candy corn pieces (for the feathers)
- 48 candy eyeballs (two for each turkey)
- Orange and yellow mini M&Ms (for the beaks)
- Red decorative icing (for the turkey's wattle or snood)
Instructions
- Preheat your oven to 275°F and line two baking trays with parchment paper. Working in small batches is key to making sure your chocolate stays soft enough to work with.
- Place 6-12 pretzel twists upside down on your parchment paper. This helps create a sturdy base for your turkey.
- Place a Rolo on each pretzel, positioning it towards the bottom so there's enough space behind it for the candy corn feathers.
- Pop the tray in the oven for just 1-2 minutes—long enough to soften the chocolate without melting it completely. You want the Rolos soft enough to press the candy corn into without them losing shape.
- Quickly and carefully press three candy corn pieces into the top of each Rolo to create the turkey's feathers. Then, add two candy eyeballs on the top half and an M&M underneath for the beak.
- Use red decorative icing to add the wattle or snood next to the M&M beak. This little detail really brings the turkeys to life!
- Allow the turkeys to set completely at room temperature for about 20 minutes, or speed up the process by popping them in the fridge for 5-10 minutes.
- Continue making your turkeys in small batches until all 24 are done. Once set, they’re ready to serve or store for later!
Want more like this? See the original post on Bite-Sized Bash.
Mini Pumpkin Fudge Truffles

These Mini Pumpkin Fudge Truffles are rich, creamy, and full of pumpkin flavor. Their small size makes them easy to serve at parties, and they’re a fun no-fuss dessert for fall gatherings or holiday cookie trays.
Pumpkin Fudge Truffles

Ingredients
- 14 oz can of sweetened condensed milk
- 1/4 cup of pumpkin puree
- 1 tbsp of unsalted butter
- 1 tsp cinnamon
- 1 cup of sugar
- 9 semi sweet chocolate chips
Instructions
- In a medium sized saucepan add the sweetened condensed milk, pumpkin puree, butter and cinnamon. Cook over a medium heat and stir constantly. The mixture needs to come to a low boil and cook. Don’t stop mixing.
- Cook until it starts to get thick, about 5-7 more minutes. You should be able to run a silicone spoon on the bottom of the pan and the mixture separates and forms back together after a few seconds.
- Once it starts taking about 5-8 seconds to come together, turn off the heat and put the mixture on the plate or in a large bowl. Let it cool a bit and then place it in the fridge for 1 hour.
- Pour the sugar into a bowl and set aside, line a tray with parchment paper and set aside and grab a toothpick.
- Butter your hands up or use spray oil, grab about 2 tbsp worth of the mixture and roll into a ball, dip and roll in the sugar and place on the tray, repeat until you have no more mixture left.
- Once all the balls are rolled and dipped into sugar take the toothpick and place your thumb slightly on the top of the ball, take the toothpick and slightly push the side of it into the ball to make the lines like a pumpkin, repeat all around the ball and to the other ones. It’s okay if your thumb slightly makes a dent in the top of the pumpkin, it needs it.
- Once all the lines are added take a chocolate chip and place it on the top middle of the pumpkin and slightly push down just a tiny bit. Serve and enjoy!
Want more like this? See the original post on Bite-Sized Bash.
Thanksgiving Pilgrim Hat Cookies

These Pilgrim Hat Cookies are a classic Thanksgiving dessert that’s always fun to make. Mini peanut butter cups, chocolate cookies, and colorful frosting come together to create an adorable treat that’s perfect for kids. They’re great for classroom parties or your Thanksgiving dessert table.
Thanksgiving Pilgrim Hat Cookies
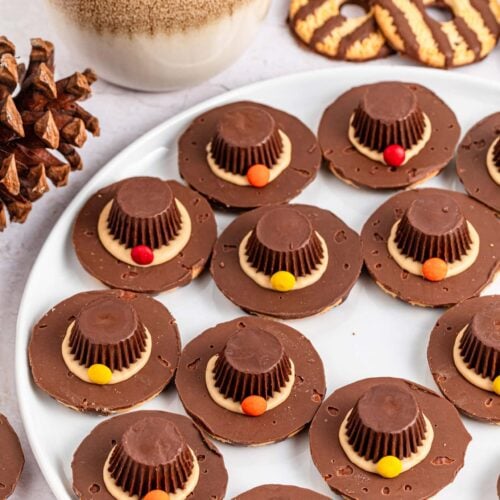
Ingredients
- ½ cup peanut butter
- 1 cup white chocolate chips
- 24 fudge-striped cookies
- 24 Reese’s dark chocolate miniature cups
- Red orange, and yellow mini M&Ms
Instructions
- Start by lining a large baking tray or cutting board with parchment paper. This will make cleanup super easy!
- In a microwave-safe bowl, melt your peanut butter and white chocolate chips on a low or defrost setting. Stir the mixture often until it's smooth and creamy.
- Once melted, transfer the mixture into a piping bag and let it cool for about 5 minutes—just enough time for it to be easy to handle but not too thick.
- Take your fudge-striped cookies and place them striped side down on the parchment paper.
- Snip the tip off your piping bag and pipe a small circle of the melted peanut butter-white chocolate mixture into the center of each cookie.
- Place a Reese’s miniature cup upside down (large side down) on top of the piped mixture, pressing gently so that the peanut butter mixture forms a "hat band" around the base of the cup.
- For the finishing touch, press a mini M&M onto the hat band to create a cute little buckle.
- Now, let your Pilgrim Hats set completely. You can pop them into the fridge for 10-15 minutes to speed up the process.
Want more like this? See the original post on Bite-Sized Bash.
📌Pin For It Later